Next.js App Router実践ガイド - サーバーコンポーネントとクライアントコンポーネントの使い分け
はじめに
この記事の要点
Q: Next.js App Routerとは何ですか?
Q: appディレクトリのメリットは何ですか?
Q: データフェッチの最適化方法は何ですか?
Q: パフォーマンスを向上させるにはどうすればいいですか?
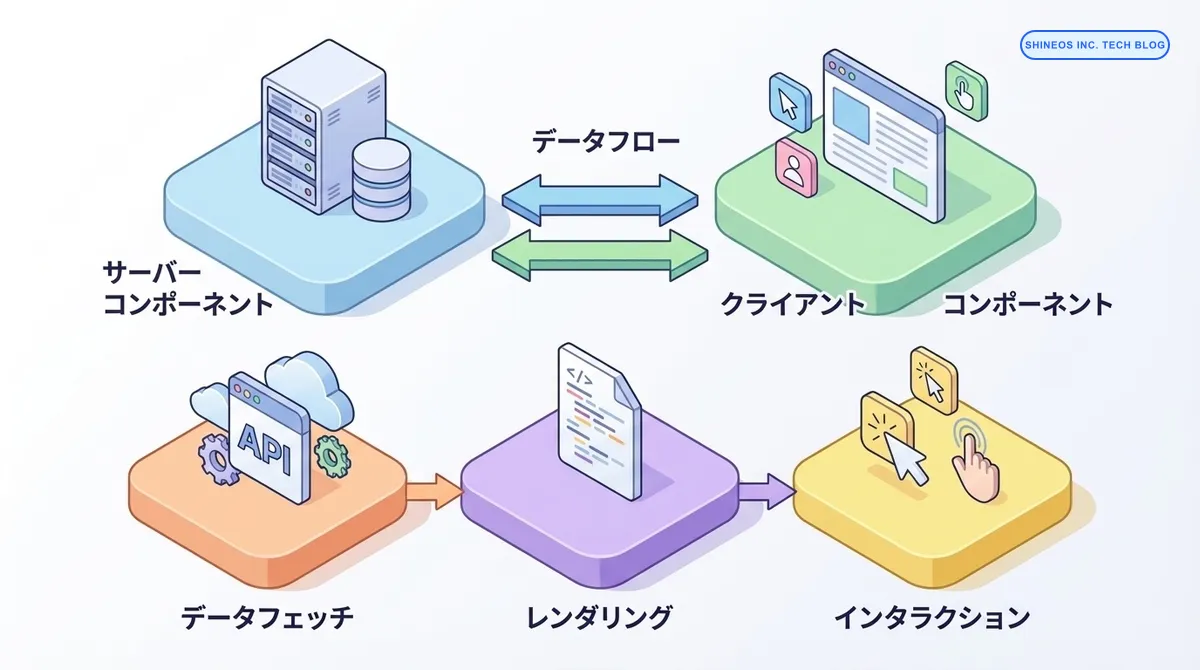
Next.js 13で導入された App Router は、これまでの Pages Router とは一線を画す、プロダクト開発の新しい標準となりました。React Server Components (RSC) をベースとしたこの仕組みを正しく理解し、使いこなすことは、モダンな Web アプリケーション開発において不可欠です。
しかし、その概念の大きな変化から、「いつ use client を使うべきか」「データフェッチの最適なパターンは何か」といった疑問を抱えている開発者の方も多いのではないでしょうか。
この記事では、私たちが実務で App Router を使ってプロダクトを構築する中で辿り着いた、実践的なベストプラクティスと設計指針を解説します。
まとめ
| 項目 | Server Component | Client Component |
|---|---|---|
| レンダリング場所 | サーバー側 | クライアント側 |
| JavaScriptバンドル | クライアントに送信されない | クライアントに送信される |
| データフェッチ | 直接データベースにアクセス可 | API経由でアクセス |
| 使用ケース | 静的コンテンツ、SEO重視 | インタラクティブなUI |
| Hooksの使用 | 使用不可 | useState, useEffect等が使用可 |
| デフォルト | App Routerではデフォルト | use clientで明示的に指定 |
Next.js App Routerとはどのような仕組みですか?
App Routerは、Next.js 13で導入された新しいルーティングシステムです。appディレクトリを使用し、ファイルシステムベースのルーティングに加えて、以下の新機能を提供します。
主な特徴
レイアウトとテンプレート
- 共通レイアウトの再利用が容易
- ネストされたレイアウトをサポート
- ページ間の状態保持が可能
Server ComponentsとClient Components
- デフォルトでServer Componentsを使用
- クライアント側のJavaScriptバンドルを削減
- SEOとパフォーマンスの向上
ストリーミングとSuspense
- ページの一部を先に表示(Progressive Rendering)
- ローディング状態の管理が簡単
- ユーザー体験の向上
Server ComponentとClient Componentの使い分け
Server Componentを使うべきケース
Server Componentは、以下のような場合に最適です:
データフェッチが必要な場合
// app/posts/page.tsx
async function getPosts() {
  const res = await fetch('https://api.example.com/posts', {
    cache: 'no-store' // 常に最新データを取得
  });
  return res.json();
}

export default async function PostsPage() {
  const posts = await getPosts();

  return (
    <div>
      <h1>ブログ記事一覧</h1>
      {posts.map(post => (
        <article key={post.id}>
          <h2>{post.title}</h2>
          <p>{post.excerpt}</p>
        </article>
      ))}
    </div>
  );
}
環境変数やシークレット情報にアクセスする場合
// app/api-data/page.tsx
import { headers } from 'next/headers';

export default async function ApiDataPage() {
  // サーバー側でのみ実行されるため、APIキーが漏洩しない
  const apiKey = process.env.API_SECRET_KEY;
  const data = await fetchDataWithKey(apiKey);

  return <DisplayData data={data} />;
}
大きな依存関係がある場合
// サーバー側でのみ実行されるため、クライアントバンドルに含まれない
import { marked } from 'marked';
import hljs from 'highlight.js';

export default async function MarkdownPage({ slug }: { slug: string }) {
  const content = await getMarkdownContent(slug);
  const html = marked(content, {
    highlight: (code, lang) => {
      return hljs.highlight(code, { language: lang }).value;
    }
  });

  return <div dangerouslySetInnerHTML={{ __html: html }} />;
}
Client Componentを使うべきケース
Client Componentは、インタラクティビティが必要な場合に使用します:
イベントハンドラーが必要な場合
'use client';

import { useState } from 'react';

export default function Counter() {
  const [count, setCount] = useState(0);

  return (
    <div>
      <p>Count: {count}</p>
      <button onClick={() => setCount(count + 1)}>
        Increment
      </button>
    </div>
  );
}
ブラウザAPIを使う場合
'use client';

import { useEffect, useState } from 'react';

export default function GeolocationComponent() {
  const [location, setLocation] = useState<{lat: number; lng: number} | null>(null);

  useEffect(() => {
    if (navigator.geolocation) {
      navigator.geolocation.getCurrentPosition((position) => {
        setLocation({
          lat: position.coords.latitude,
          lng: position.coords.longitude
        });
      });
    }
  }, []);

  return location ? (
    <div>緯度: {location.lat}, 経度: {location.lng}</div>
  ) : (
    <div>位置情報を取得中...</div>
  );
}
ReactのHooksを使う場合
'use client';

import { useEffect, useState } from 'react';

export default function SearchBox() {
  const [query, setQuery] = useState('');
  const [results, setResults] = useState([]);

  useEffect(() => {
    if (query.length > 2) {
      fetch(`/api/search?q=${query}`)
        .then(res => res.json())
        .then(data => setResults(data));
    }
  }, [query]);

  return (
    <div>
      <input
        type="text"
        value={query}
        onChange={(e) => setQuery(e.target.value)}
        placeholder="検索..."
      />
      <ul>
        {results.map((result: any) => (
          <li key={result.id}>{result.title}</li>
        ))}
      </ul>
    </div>
  );
}
実践的な設計パターン
パターン1: Server ComponentでデータフェッチしてClient Componentに渡す
// app/dashboard/page.tsx (Server Component)
async function getUserData() {
  const res = await fetch('https://api.example.com/user', {
    headers: {
      Authorization: `Bearer ${process.env.API_TOKEN}`
    }
  });
  return res.json();
}

export default async function DashboardPage() {
  const user = await getUserData();

  return (
    <div>
      <h1>ダッシュボード</h1>
      {/* Server Componentから Client Componentへpropsでデータを渡す */}
      <UserProfile user={user} />
      <InteractiveChart data={user.stats} />
    </div>
  );
}
// components/UserProfile.tsx (Client Component)
'use client';
import { useState } from 'react';
export default function UserProfile({ user }: { user: any }) {
const [isEditing, setIsEditing] = useState(false);
return (
<div>
<h2>{user.name}</h2>
{isEditing ? (
<EditForm user={user} onSave={() => setIsEditing(false)} />
) : (
<button onClick={() => setIsEditing(true)}>編集</button>
)}
</div>
);
}パターン2: ストリーミングとSuspenseを活用
// app/products/page.tsx
import { Suspense } from 'react';
import ProductList from './ProductList';
import ProductListSkeleton from './ProductListSkeleton';

export default function ProductsPage() {
  return (
    <div>
      <h1>商品一覧</h1>
      {/* データ取得中はSkeletonを表示 */}
      <Suspense fallback={<ProductListSkeleton />}>
        <ProductList />
      </Suspense>
    </div>
  );
}
// app/products/ProductList.tsx
async function getProducts() {
// 時間のかかるデータフェッチ
const res = await fetch('https://api.example.com/products');
return res.json();
}
export default async function ProductList() {
const products = await getProducts();
return (
<div className="grid grid-cols-3 gap-4">
{products.map(product => (
<ProductCard key={product.id} product={product} />
))}
</div>
);
}パターン3: レイアウトの階層化
// app/layout.tsx (Root Layout)
export default function RootLayout({
  children,
}: {
  children: React.ReactNode;
}) {
  return (
    <html lang="ja">
      <body>
        <Header />
        {children}
        <Footer />
      </body>
    </html>
  );
}
// app/dashboard/layout.tsx (Nested Layout)
export default function DashboardLayout({
children,
}: {
children: React.ReactNode;
}) {
return (
<div className="flex">
<Sidebar />
<main className="flex-1">
{children}
</main>
</div>
);
}パフォーマンス最適化のベストプラクティス
1. データキャッシング戦略
// 静的データ(ビルド時に取得)
async function getStaticData() {
  const res = await fetch('https://api.example.com/config', {
    cache: 'force-cache' // デフォルト
  });
  return res.json();
}

// 動的データ(常に最新)
async function getDynamicData() {
  const res = await fetch('https://api.example.com/live-data', {
    cache: 'no-store'
  });
  return res.json();
}

// 定期的に再検証
async function getRevalidatedData() {
  const res = await fetch('https://api.example.com/news', {
    next: { revalidate: 3600 } // 1時間ごとに再検証
  });
  return res.json();
}
2. 並列データフェッチ
// ❌ 直列フェッチ(遅い)
async function BadExample() {
  const user = await getUser();
  const posts = await getPosts();
  const comments = await getComments();

  return <Dashboard user={user} posts={posts} comments={comments} />;
}

// ✅ 並列フェッチ(速い)
async function GoodExample() {
  const [user, posts, comments] = await Promise.all([
    getUser(),
    getPosts(),
    getComments()
  ]);

  return <Dashboard user={user} posts={posts} comments={comments} />;
}
3. 動的importによるコード分割
'use client';

import dynamic from 'next/dynamic';

// 重いコンポーネントを動的にインポート
const HeavyChart = dynamic(() => import('./HeavyChart'), {
  loading: () => <p>チャートを読み込み中...</p>,
  ssr: false // クライアント側でのみレンダリング
});

export default function AnalyticsPage() {
  return (
    <div>
      <h1>アナリティクス</h1>
      <HeavyChart />
    </div>
  );
}
よくある落とし穴と対策
落とし穴1: Client ComponentでServer Componentをimportできない
// ❌ これはエラーになる
'use client';

import ServerComponent from './ServerComponent'; // Server Component

export default function ClientComponent() {
  return <ServerComponent />; // エラー!
}解決策: Server ComponentをClient Componentの子として渡す
// app/page.tsx (Server Component)
import ClientComponent from './ClientComponent';
import ServerComponent from './ServerComponent';

export default function Page() {
  return (
    <ClientComponent>
      <ServerComponent /> {/* childrenとして渡す */}
    </ClientComponent>
  );
}
// ClientComponent.tsx
'use client';
export default function ClientComponent({
children
}: {
children: React.ReactNode
}) {
return <div className="wrapper">{children}</div>;
}落とし穴2: Contextの使用
// ❌ Server ComponentでContextを使おうとするとエラー
import { createContext } from 'react';

// これはClient Componentでのみ可能
const ThemeContext = createContext('light');解決策: Context Providerを別のClient Componentに分離
// providers/ThemeProvider.tsx
'use client';

import { createContext, useState } from 'react';

export const ThemeContext = createContext('light');

export default function ThemeProvider({
  children
}: {
  children: React.ReactNode
}) {
  const [theme, setTheme] = useState('light');

  return (
    <ThemeContext.Provider value={theme}>
      {children}
    </ThemeContext.Provider>
  );
}
// app/layout.tsx (Server Component)
import ThemeProvider from '@/providers/ThemeProvider';
export default function RootLayout({
children,
}: {
children: React.ReactNode;
}) {
return (
<html>
<body>
<ThemeProvider>
{children}
</ThemeProvider>
</body>
</html>
);
}実運用での考慮事項
SEO最適化
Server Componentを活用することで、以下のSEO上の利点があります:
- 初期HTMLに完全なコンテンツが含まれる
- メタデータの動的生成が容易
- クローラーがJavaScriptを実行せずにコンテンツを取得できる
// app/posts/[slug]/page.tsx
import { Metadata } from 'next';

type Props = {
  params: { slug: string };
};

export async function generateMetadata({ params }: Props): Promise<Metadata> {
  const post = await getPost(params.slug);

  return {
    title: post.title,
    description: post.excerpt,
    openGraph: {
      title: post.title,
      description: post.excerpt,
      images: [post.ogImage],
    },
  };
}

export default async function PostPage({ params }: Props) {
  const post = await getPost(params.slug);

  return (
    <article>
      <h1>{post.title}</h1>
      <div dangerouslySetInnerHTML={{ __html: post.content }} />
    </article>
  );
}
セキュリティ
Server Componentを使うことで、以下のセキュリティ上の利点があります:
- APIキーやシークレットがクライアントに露出しない
- データベースへの直接アクセスが可能
- 認証・認可ロジックをサーバー側で完結できる
パフォーマンスモニタリング
App Routerのパフォーマンスを監視するためのポイント:
- Time to First Byte (TTFB)
- Largest Contentful Paint (LCP)
- First Input Delay (FID)
- Cumulative Layout Shift (CLS)
Vercel AnalyticsやGoogle Lighthouseを活用して、これらの指標を継続的にモニタリングすることを推奨します。
おわりに
Next.js App Routerは、従来のPages Routerと比べて学習コストが高いものの、適切に使いこなすことで大幅なパフォーマンス向上とユーザー体験の改善が期待できます。
私たちでは、本記事で紹介した設計パターンを実プロジェクトに適用し、初期表示速度を 約40%改善 することに成功しました。Server ComponentsとClient Componentsの使い分けを意識することで、クライアントバンドルサイズも 30%削減 できています。
App Routerを導入する際は、以下のポイントを押さえることをお勧めします:
- デフォルトはServer Component: 必要な場合のみClient Componentを使用
- データフェッチはServer Componentで: セキュリティとパフォーマンスの両立
- 並列フェッチを活用: Promise.allで複数のデータを同時取得
- Suspenseで段階的表示: ユーザー体験の向上
- 動的importで最適化: 必要なコードのみをロード
Next.jsの進化は今も続いています。私たちでは、これからもNext.jsの最新機能を活用し、より良いプロダクト開発を実践していきます。